A Tutorial for Drawing an Accurate Circle in Perspective
created by
Teemu Pekkanen
2004-2006
All rights reserved
Foreword
This tutorial is a by-product of the learning process of the undersigned, so it has many things that are left explained because of writers limited experience and knowledge. The idea of this tutorial is not to give throughout guiding how to draw a circle in every possible angle, but present the original idea with a simple example.
Tools and materials
In addition to usual drawing utensils, also a ruler and a protractor is needed.
1. Beginning with a square
It is necessary to start with drawing a square in perspective to make an accurate circle. Although this technique works with any correctly drawn square, this tutorial uses a simple square which perspective point is straight ahead. Only one vanishing point is needed in this tutorial, which makes it more distinct and easier to draw.
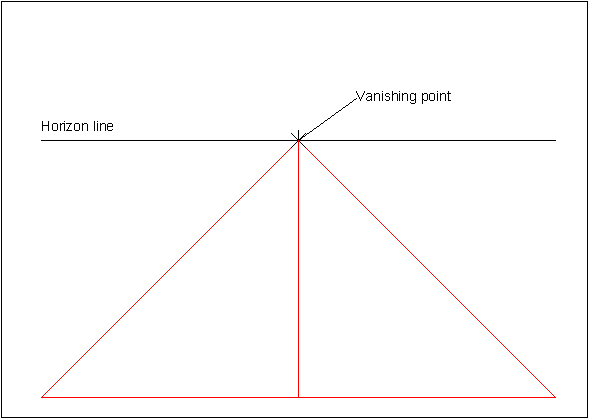
Image 1.
First step is to draw an edge of the square that is the closest to the imaginary viewer of the drawing(lower part of the paper). In this tutorial that line is drawn parallel to horizon line, so that square could be drawn symmetrical. The vanishing point of the square is at the perpendicular from the middle point of the lower edge of the square. This means that the vanishing point in image 1. is located in horizon line straight above the middle point of the lower edge.
Now that vanishing point is known, the side lines of the square can be drawn from the ends of the lower edge to the vanishing point.
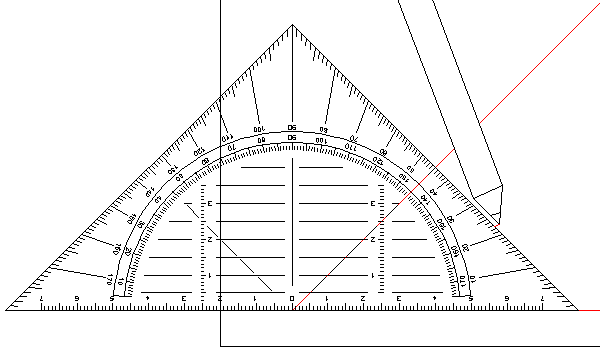
Image 2.
To form a full square, it is still needed to draw an upper edge. For determining the place of the upper edge of the square, angles of the lower corners must be divided with two. If the original angle is 45 degrees, then the new angle would be 22.5 degrees.
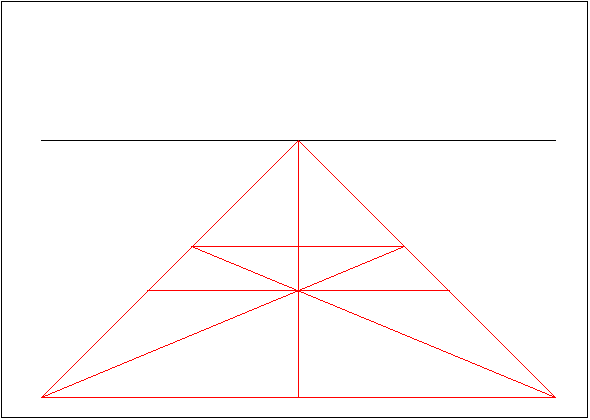
Image 3.
The new lines intersect in the middle of the square, and another time with the sidelines of the square, where the upper corners of the square is located. Now it is possible to draw the upper edge from those corners. Square is also needed to be divided horizontally with a line that goes through the center point.
2. Creating an octagon
Next phase is to draw an unsymmetrical octagon, for shape of it is closer to a circle than a square is. It is also required for some construction lines for drawing an accurate circle.
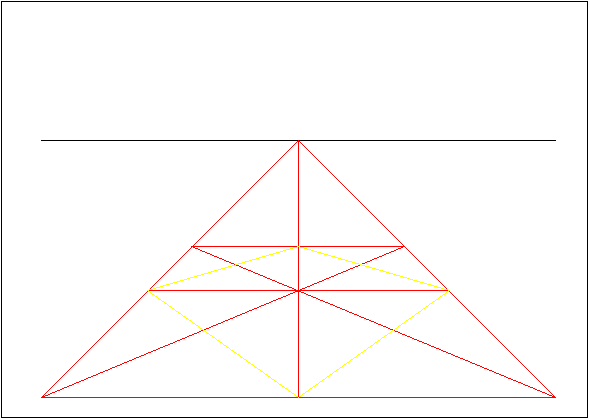
Image 4.
An another square must be drawn by connecting the middle points of the edges.
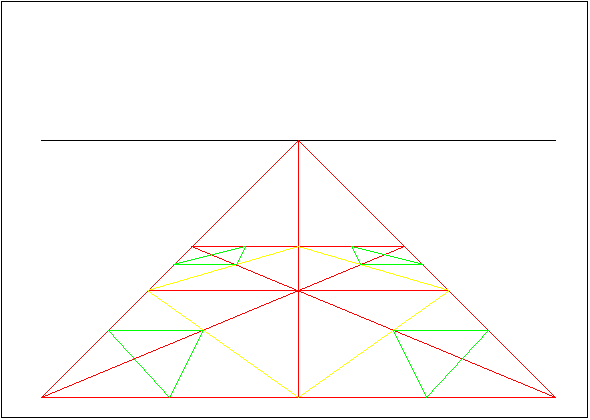
Image 5.
Next has to be drawn small squares in the corners. Drawing the edges of the squares can be done by aligning a ruler to go through the intersection points of the inner square and the outer square's diagonally intersecting lines. To determine the center points of the corner squares, their opposite corners must be connected with a line.
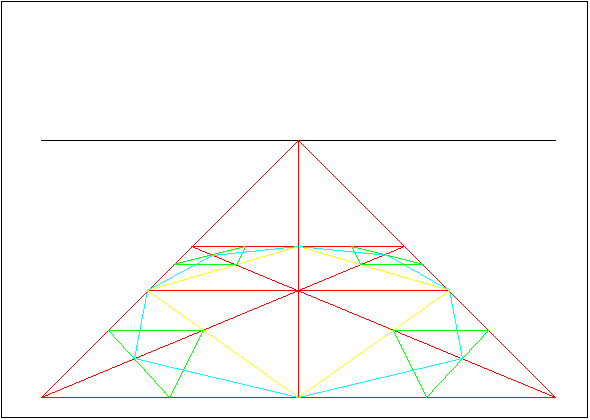
Image 6.
Now it is possible to draw an unsymmetrical octagon. That can be done by drawing lines from middle points of the outer square to the nearest center point of a corner square.
3. Determing accurate points of the circle
To determine where arc of an circle goes in some crucial points, there must be drawn some more construction lines inside of the corner squares.
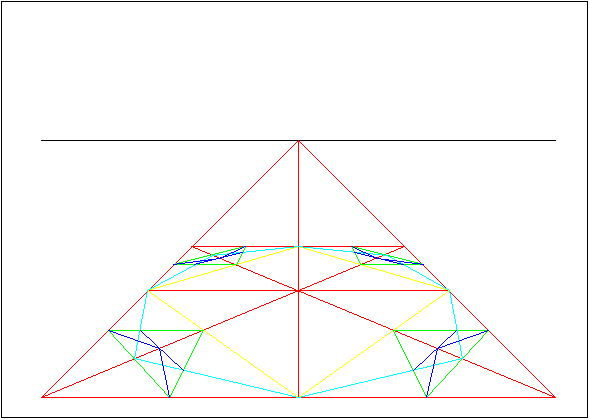
Image 7.
Those points where the octagon and a corner square intersects, must be connected with a line. From that point where the previous line intersects with diagonally aligned line, must be drawn lines to those corners that are closest to the outer square's middle points. The arc of the square goes through those intersection points that came when the previous lines were drawn.
4. Finishing the lines with drawing freehand
The last phase is to draw freehand the circle.
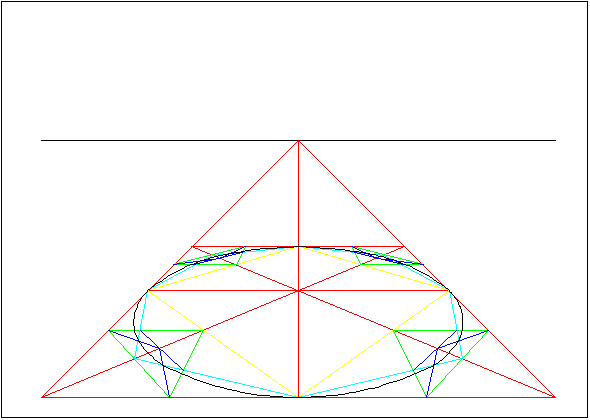
Image 8.
The arc of the circle goes like a bow from the point to another.
5. Minimalizing the construction lines
Too many construction lines messes up the picture, so the drawer might want to make them as small as possible.
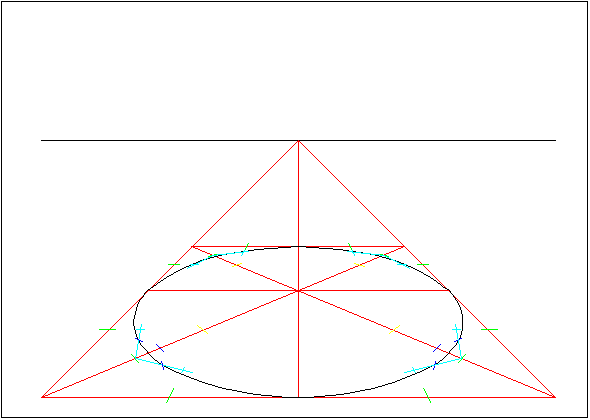
Image 9.
The costruction lines can be minimalized by drawing only the needed intersection points, as it is shown in Image 9. Drawing a full octagon still might be good idea, because it helps to trace the circle.
6. Utilization of the technique
Finally we look into what kind of advantages this technique offers in use. Drawing a cylinder is a good example for this purpose. Drawing is started by drawing two squares that are on top if one another. Then circle definition points are made inside the squares. A shape of a cylinder is formed when the corresponding definition points of the layered squares are connected.
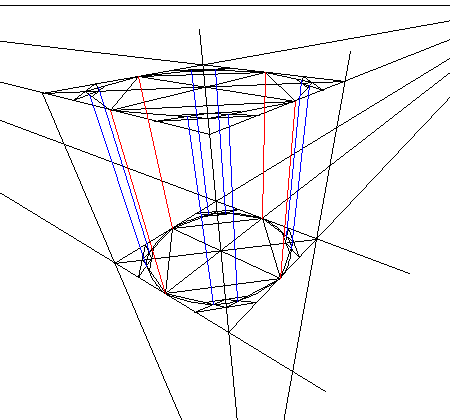
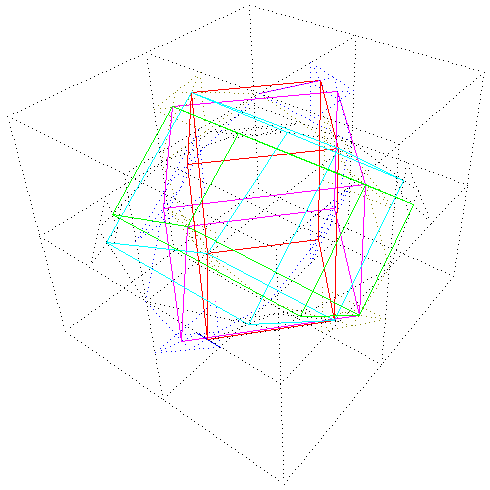
Geometry is plain mathematics so it can be applied to computer programs to make more efficient algorithms. The next picture has a cube that has three "circled" squares on different planes. The definition points that are on the same orthogonal planes are connected with continuous lines.
