A Tutorial for Installing Linux Dosbox on a 32-bit computer
created by
Teemu Pekkanen
2021
All rights reserved
1. Downloading and preparing media
This tutorial is made with Windows 10, because most of the people uses it. If you use Ubuntu or Debian Linux, it would work best. I do not take responsibility from anything that might happen if you follow this tutorial. I would recommend to use a less important computer with this kind of projects, so that it does not matter if they break or something else happens.
First download a 32-bit Debian i386 netinst CD distro, that has no graphical user interface if not specially installed. Bullseye(11) is the latest distribution, but Buster(10) is the stable version. That is why I use Buster.
This can be found from:
https://cdimage.debian.org/debian-cd/current/i386/bt-cd/
You need a BitTorrent or similar program to download torrent files.
https://www.bittorrent.com/
There is an installation package for especially usb-sticks, that is named as mini.iso. I have tried that, but for some reason Dosbox graphics doesn’t work for me, at least the version that I have tried.
You can either burn a CD or make a USB-stick installation. First is shown how to burn to a CD, and after that USB.
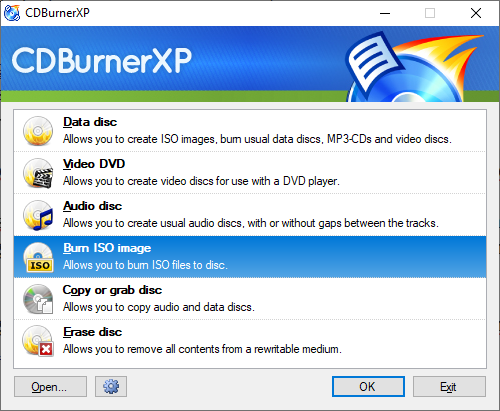
You can burn the ISO image to a CD with a free CD burning software, like CDBurnerXP:
"https://cdburnerxp.se/en/home"
You can burn the ISO file to DVD with choosing “Burn ISO Image” from the start menu.
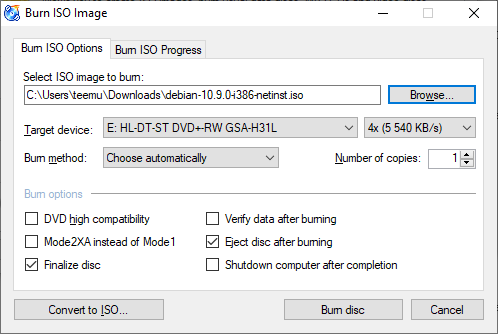
Select the ISO file to burn from your computer by clicking Browse…
Now you have to wait a while.
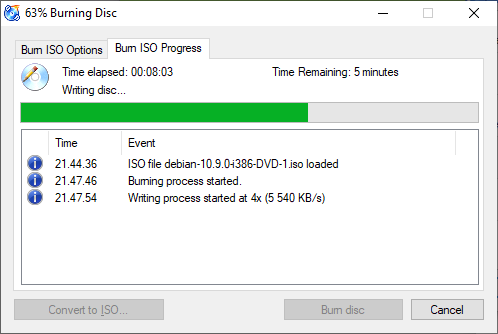
After you have finished burning CD, go to 2. Installing Debian OS, or continue with installing OS to USB-stick.
Next download an application, that will install the image to an USB-stick. I would recommend BalenaEtcher “https://www.balena.io/etcher/”, that I use that in this tutorial. Rufus “https://rufus.ie/en_US/” and Unetbootin “https://unetbootin.github.io/” should work also.
Next open BalenaEtcher and choose: Flash from file. After that you browse for your installation package.
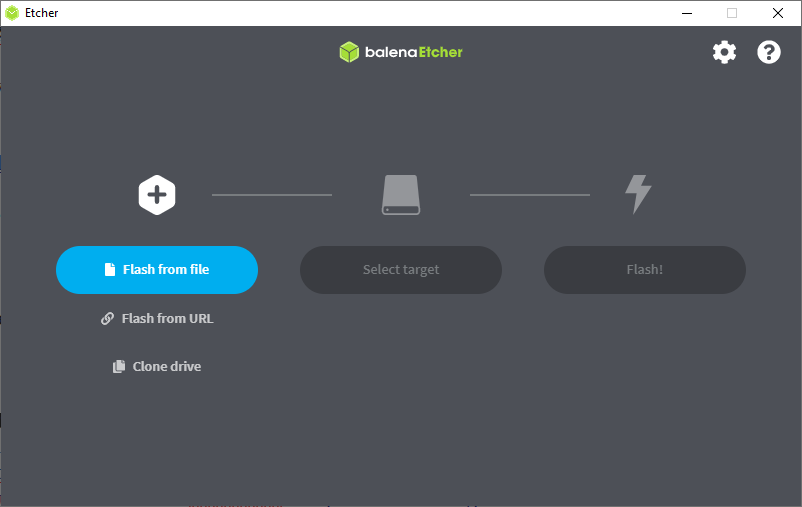
Select "Flash from file.
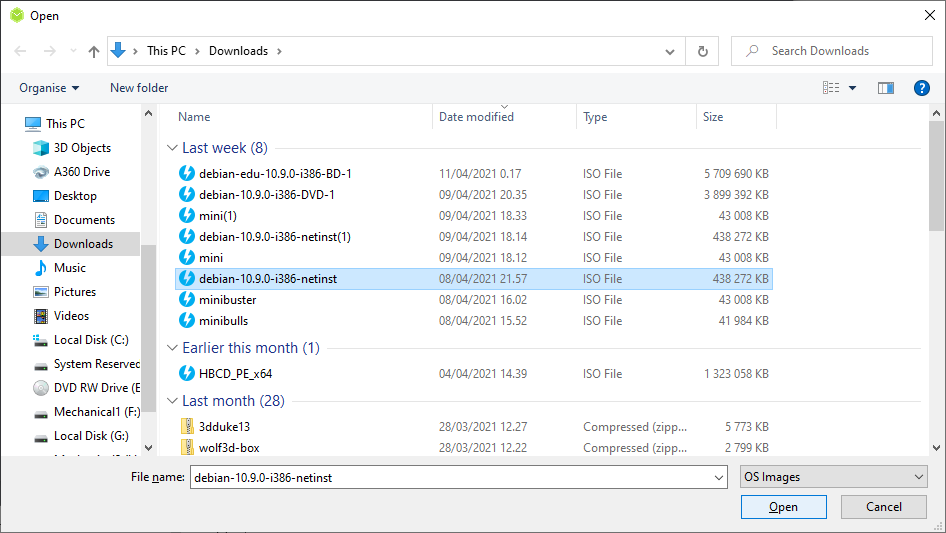
Select the ISO file.
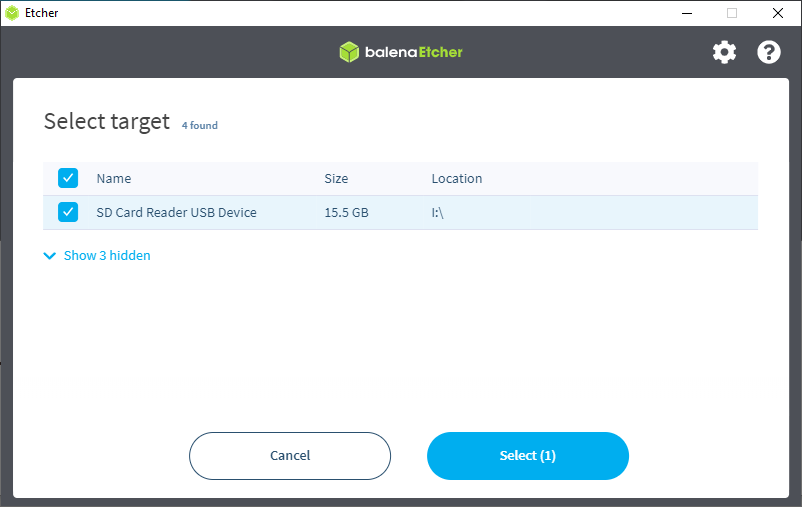
Program asks for a device where to install the operating system: Remember to check the box of the usb stick.
Next you just click “Flash!” button. System might ask for permission to load, click ok. When flashing is ended, you can close BalenaEtcher. Now you must eject the USB-stick from the system with the file manager. If you use Windows OS, it might not show the USB-stick. This is because that system does not recognize any Linux based media.
2. Installing Debian OS
Next we start with inserting the installation media, whether it be DVD or a USB-stick. System enters to: Debian GNU/Linux installer menu (BIOS mode)
There are following options available:
Graphical install
Install
Advanced options>
Accessible dark contrast installer menu>
Help
Install with speech synthesis
Choose: Choose Advanced options > Expert install
Choose language: Choose your language from the list
Select your location: If you chose english, it shows english speaking countries. For other countries, choose other. > Choose the continent on which your country is. > Choose your country. > Choose locale. > Choose additional locale. Choose between Primary and additional locale.
Configure the keyboard: Choose your keyboard layout country.
Load installer components from CD: CD-ROM detected. Continue. > Modules to load: Usb storage selected: Continue. > Installer components to load: choose-mirror and sound-modules.
Configure the network: Detect network hardware. > Waiting time 3, continue. > Choose ethernet network device. > Auto-configure networking? Yes. > Waiting time 3, continue. Hostname: give a name to computer. Domain name: skip with enter.
Choose a mirror of the Debian archive: Protocol for file downloads: http. > Debian archive mirror country. Choose country. > Debian archive mirror: deb.debian.org > HTTP proxy information: continue.
Set up users and passwords: Enable shadow passwords? No. > Allow login as root? No. NOTICE! THIS MUST BE NO! > Full name for the new user: Give your name. > Username for your account: offers your first name without capital letters. > Choose a password for the new user: Give your user password, twice.
Configure the clock: Set the clock using NTP? Yes. > NTP server to use: Continue. > Select your time zone: Choose your time zone if given.
Partition disks: Choose an installation step: Detect disks. > Guided partitioning > Partitioning method: Guided – user entire disk. > Select disk to partition: SCSI1 is most likely the right drive. > Partitioning scheme: All files in one partition. > Remove existing logical volume data? Yes. > Finish partitioning and write changes to disk. > Write changes to disks? Yes.
Install the base system: Kernel to install: linux-image-4.10.0-16-686 (17/4/21) > Drivers to include in the initrd: generic: include all available drivers. > Configuring console-setup: Choose UTF-8. Character set to support: Guess optimal character set.
Configure the package manager: Scan another CD or DVD? No. > Use a network mirror? Yes. > Protocol for file downloads: http > Debian archive mirror country: Choose your country. Debian archive mirror: deb.debian.org > HTTP proxy: press enter to skip. > Use non-free software? Yes. > Enable source repositories in APT? Yes. > Services to use: needed services are checked, continue.
Select and install software: Updates management on this system: No automatic updates >
Participate to the popularity test: No. > Choose the software to install: choose only standard system utilities.
Install the GRUB boot loader on a hard disk: Install the GRUB boot loader to the master boot record? Yes. > Device for boot loader installation: Correct is probably /dev/sda. > Force GRUB installation to the EFI removable media path? No.
Finish the installation: Is the system clock set to UTC? Yes. > Installation complete. Remove installation media and continue.
3. Start using Debian
After installation what you will see is:
Debian GNU/Linux 10 “computername” tty1
“computername” login:
Here you must enter your username, that you made at “Set up users and passwords” section.
After that you will be asked your password.
You are at prompt:
“username”@”computername”:~$
Disable “deb cdrom” as a repository:
Enter: sudo nano /etc/apt/sources.list
Put a hashtag(#) in front of line “deb cdrom:”
Ctrl-X to exit. Save modified buffer? Press Y.
If you get a (Y/N) question during the installation, press Y and enter.
Type: sudo apt update. > [sudo] password for “username”:(enter password)
You should get all your packages updated. Might be, that the installation has the latest packages.
Type: sudo apt upgrade. > [sudo] password for “username”:(enter password)
Type: sudo apt install dosbox
This installation asks confirmation to install all the packages. Y and enter.
Enter: sudo dosbox
If you do not enter as sudo, you get following: Exit to error: Can’t init SDL Unable to open mouse.
If Dosbox does not work at all, you should try: sudo apt install dosbox --fix-missing
The problem is, that keyboard inputs does not work. When Dosbox starts first time, it makes a config file "dosbox-0.74-2.conf", which is in "/root/.dosbox/" folder. It used to be, that dosbox started without “sudo”. It meant that folder “.dosbox” was under “user” folder.
Dosbox does not operate, so reboot is needed.
After restart, type “sudo nano /root/.dosbox/dosbox-0.74-2.conf”. If it does not work, view the folder contents with “ls” command: "sudo ls /root/.dosbox". This shows the name of .conf file.
Let’s modify dosbox conf file:
First: In the first group (sdl) make usescancodes=false. This fixes the text input problem.
Next: under (dosbox), memsize=64. I have read that it is maximum the system uses.
Last: under (autoexec) "mount c /home/”username”/dosgames" (and the last row) "c:"
4. Installing games
Now, we need some games!
Remember, Linux understands Windows type hard disk formats, but Windows doesn't understand ext-type of formats.
Let us make now a games directory in your user folder. Go to (/home/”username”/). Then make the folder > sudo mkdir dosgames
Save some games to a USB-stick and enter it to a free usb slot on your project PC.
It says something following: [sdb] Assuming drive cache: write through...
Next phase is to mount the USB-stick to the system.
I made a “dosgames” folder under “media” folder: sudo mkdir “foldername”
If the system does not tell what is the name of the installation media, you should type: sudo lsblk
This should tell all of the medias that are attached to the system. If you are not sure which one is the media you need, detach the it, use again lsblk and that which one is gone is the one.
Sudo mount /dev/sdb/ /media/dosgames/
Go to the /media/dosgames/
Copy games to your folder (/home/”username”/dosgames).
Copy with following command: sudo cp -R (source_folder) (destination_folder): sudo cp -R /media/dosgames/"game"/ /home/"username"/dosgames/
Now you can start a game by starting dosbox first. Type “sudo dosbox”.
4. Setting Audio
Now that we have games, we need to test them. Very soon you notice, that game runs well, but there is no audio. We want to fix that one, because sounds are very important for perfect gaming experience.
What we need, can be found from the following page: https://wiki.debian.org/ALSA
The dependencies that have been mentioned there, should fix the missing sound.
libasound2
libasound2-plugins
alsa-utils
alsa-oss
alsamixergui
apulse
alsa-firmware-loaders
To get these dependencies installed, you need to type: sudo apt install “package name”
To initialize ALSA, you need to type: sudo alsactl init
My computer says in this phase:
Found hardware: “HDA-Intel” “Realtek ALC361” and so on…
Hardware is initialized using a generic method.
Install: pulseaudio
Run: pulseaudio --start
5. Random Things
I leave graphics settings for you to try. Graphics works for me, but games use only a small part of the screen.Joysticks should work without much problems. I Inserted a USB WingMan Precision gamepad and it worked well without any settings.
I enter a link of this page to my post at Vogons.org. You can enter your responses there.
https://www.vogons.org/viewtopic.php?f=31&t=80751
